Lessons after buying and renovating my apartment in Irún (Spain)
After being an expat for many years, life brought me back to my hometown in Irún. Shortly after, I decided to start looking for my own place. Today marks exactly one year since I moved into my new apartment. On this occasion, I wanted to reflect on what I’ve learned during these months, from searching and buying the perfect apartment, to renovating it from scratch. For those decoration lovers out there, I’ve also included plenty of before and after pictures to show you the transformation of the property. In case you’re interested in buying or renovating an apartment in Spain, I trust these tips will be helpful!
Tips for buying and renovating an apartment in Spain
Buying your own place and then renovating it can seem like a daunting task, especially if it’s the first time you’re doing so. Where to get started? Who to ask for help?
Based on my own lessons after buying and renovating my apartment in Spain, below are my tips and main takeaways that will hopefully guide you throughout this process.
Set your budget and your needs
Get your numbers right
First things first, sit down and crunch the numbers. How much do you have in your savings? Will you be asking for a mortgage? How much should your ideal home cost? Do you envision a renovation or are you a looking for a turnkey place?
Financially speaking, getting the numbers right will be key before proceeding with the next steps. Personally though, I spent twice as much on the renovation as I initially thought. Thankfully, I had the bandwidth to do so and I didn’t want to skimp on my own house, but I hope to be better at tightening my belt in the future. Here are my own numbers to give you an idea:
- Maximum purchase cost: 200.000 euros
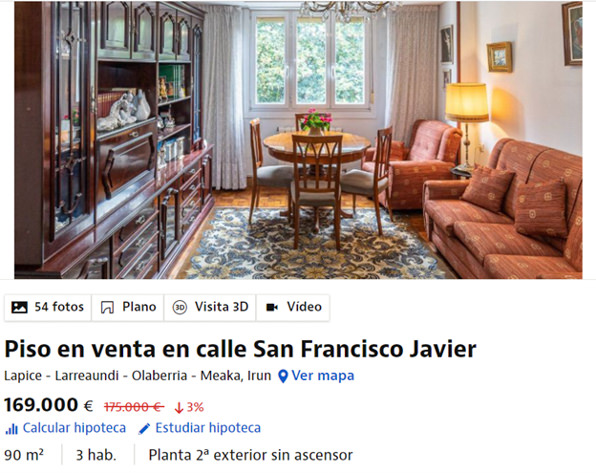
- Apartment price: I finally paid 167.000 euros although it was originally listed for 169.000 euros (I could have negotiated more, but I didn’t want to risk losing it if offering a much lower price)
- Renovation cost: almost 58.000 euros (this includes plumbing, electricity, all construction materials and appliances as well as the renovation permit).
- Decoration: around 10.000 euros
- Tax office, valuation, notary and mortgage fees: around 5.700 euros
- Total cost: 240.700 euros

Which are your requirements?
Also, ask yourself about the requirements of your ideal home and how you will live in that space. Will you be there by yourself or do you have family and or pets? Would you like to have a balcony? Will you be working from home? All these questions will help you filter and prioritize when looking for a property.
In my case, for example, I had the following requirements:
- I wanted to live in my hometown, Irún, be it in the city center or nearby (a 10-15 min walk maximum).
- I was looking for an apartment with lots of natural light.
- Another requirement was that the apartment included a storage room in the building.
- Lastly, I desired the apartment to be in a quiet area.
Look for your ideal home
In Spain, the most popular site when looking to purchase or rent a property is called Idealista. You will find thousands of announcements here, from houses and apartments, to garages, shops or storage rooms. You can use various filters according to your preferences (area, price, number of rooms and bathrooms, and so on).
I actually found my apartment on Idealista (it was listed by Kampo real estate agency), but other sites that you may use include Fotocasa or Mil Anuncios.
Be patient and realistic
Patience will be key during the process of buying and even renovating your apartment later on.
There’s no way around it: everything takes longer than expected. For example, my renovation took me around seven months, far more than what I was initially planning.
Play the long game and try to be as optimistic and realistic as possible. For sure there will be setbacks along the way, but as long as you stand by your objectives, you’ll be able to keep going and achieve your vision.
Negotiate the best terms
In my case, I took the time to visit 9 different banks (Abanca, Banco Santander, Bankinter, BBVA, Caixabank, Caja Laboral, Caja Rural de Navarra, Kutxabank, Openbank) in search of a mortgage that would best fit my interests. Yes, I spent quite a few hours in various branches explaining my financial situation and plans for the future. However, doing so helped me to compare all the offers, discard some of them and even put forward competitive counteroffers. Don’t run with the first option that comes on hand.
By the way, a similar approach goes for the providers: when sourcing the materials for your home, compare the proposed budgets and decide accordingly. I would suggest that you check with at least three different companies or professionals for the bigger renovation items such as plumbing, electricity or painting. Don’t be afraid to get back to them and ask them any questions you might have.
I also explored the possibility of an online mortgage broker through Housfy, but eventually I decided against it since I wanted to take care of the negotiation myself.
In the end, patience and back and forth negotiations paid off: I signed a mortgage with BBVA at 0.9% fixed interest rate for a 20 year-period (in January 2022) and I couldn’t be happier with those conditions now.
Know the rules for buying and renovating
From the regulations that apply when purchasing a property in Spain, to the taxes that you need to pay, knowing the rules is essential if you want to avoid unpleasant surprises. Kindly note that conditions may vary depending on the Spanish region. For further information, you can always consult with a real estate agent or lawyer in your area.
Detailed below are the main legal and financial aspects you should take into account when buying and renovating a property in Spain:
- Contrato de arras: in Spain, this is a deposit contract that is signed between the buyer and the seller in order to secure the property purchase. The amount can be negotiable, although it is usually 10% of the property cost.
- Tax office, valuation, notary and mortgage fees: the buyer is in charge of paying these fees, including the valuation of the apartment (known as tasación). Typically, the bank with whom you’ve signed the mortgage will ask you for a deposit (provisión). The abovementioned charges will be paid using the money of that deposit. Note that in Spain, you will have 10 days between the reading of the mortgage conditions and the actual signature, meaning you’ll need to stop by the notary twice.
- Impuesto sobre Transmisiones Patrimoniales (ITP): in the Basque province of Guipúzcoa, ITP is 2.5% of the selling price of the property provided that the buyer will regularly reside there at least for three years. You can only take advantage of this reduced rate once.
- Licencia de obras (renovation permit): if you’ll be renovating the property you’ve purchased, check with your local council how much it will cost you to get the permit to start with the renovation. In the case of Irún, I did the procedure online (licencia de obra menor) and it was approved quickly. The cost of the permit was 5% of the declared budget for the renovation (in my case, I paid 225.30 euros).
- Impuesto sobre Bienes Inmuebles (IBI): once you’ve bought the property, you’ll have to pay IBI yearly. This tax is collected by the local councils. In the case of Irún, you can check more details about IBI here.
The renovation process of my apartment
Envision a clear layout of your home according to your needs
As soon as I first visited the apartment that I would later purchase, I had a clear vision of what the final layout would look like. In my case, I didn’t mind going through a renovation. Luckily, both my parents are really talented when it comes to giving houses a fresh look. My Dad is more of a handyman, while my Mum has a gift for decoration.
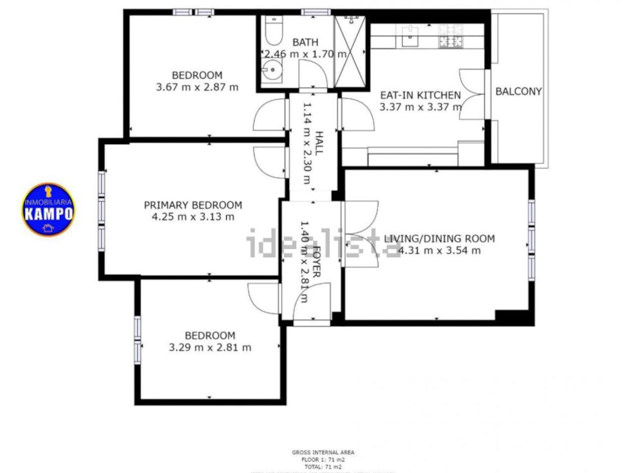
The original floor plan had three bedrooms, one bathroom, a kitchen, a living room, a balcony and a storage room above the property. However, I conceived an open kitchen connecting with the living room. I also imagined turning the third bedroom into a walk-in closet with a bathroom in my bedroom. Other than that, the layout made sense to me. The kitchen, living room and main bathroom were big enough for me and the second bedroom could be easily set as my office, with a sofa-bed for the occasional guests. The balcony was perfect to enjoy some fresh air, especially in the summer time, and the storage room was really convenient to have on hand whatever I didn’t need at home.
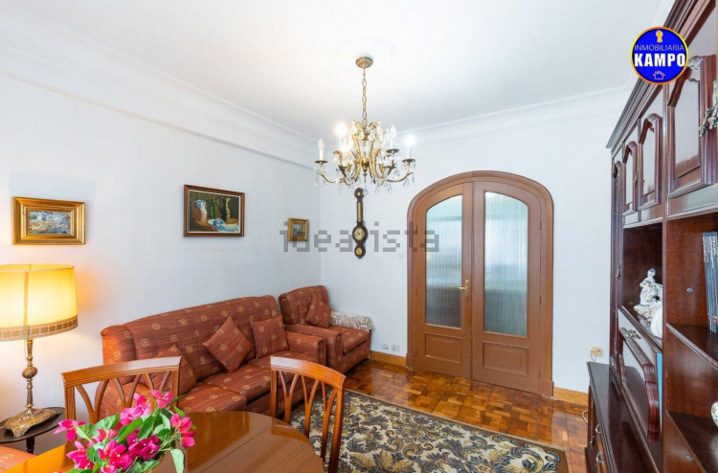
The building had been built in 1961 and my apartment featured old furniture and outdated decoration. Hence, I decided that I would only keep some items (mainly the chandeliers, the mirrors, some tableware, a closet and a chest of drawers) while discarding the rest. Once we got all the unnecessary things out of the way and we cleared the apartment, I was ready to start renovating right away!
In case you’re in need of inspiration, TV shows, decoration magazines or Pinterest can give you plenty of ideas. These are some of the ones I watched: Reforma Integral, Fixer to Fabulous or Property Brothers. The list is of course virtually endless!
Advantages of renovating your home
Following my own experience with renovating my apartment in Irún, here are some pros of renovating vs purchasing a turnkey place:
- Second-hand homes or houses that need a renovation are typically less expensive than ready to move-in listings. Sure, you need to take into account the cost of the renovation, but it might still be worth in many cases.
- You can completely tailor the layout of the new home according to your needs.
- By renovating it, you’re adding value to an already existing property. You can also reuse some elements and give them a new life.
- You can save some money by taking care of the renovation yourself, provided that you know what you’re getting yourself into. Don’t hesitate to contact professionals when you need to do so if things go wrong. In my case, I worked hand in hand with my Dad, who’s a very talented handyman, during the first stages of the renovation (demolition, making grooves, sanding the walls). The plumber, electrician, builder and painter came on board later on.
- Renovating your own future home is extremely rewarding and satisfying. You’ll feel very proud of the achievement, but I can assure you it’s physically exhausting. In my case, it was even therapeutic although I was juggling remote work at the same time!
- You’ll learn a lot about how things work in a house and all the different tools and materials you can use. After this experience, you’ll appreciate construction workers and the renovation world even more.
In sum, it takes a village to renovate an apartment, but it’s worth it in the end!
Some before, in between and after pictures
You wouldn’t believe how my current apartment looked like if it wasn’t for these pictures showing the before and after transformation. Amazing, right?
For your ease of reference, I’ve sorted them by room and I also listed the sources and providers in case you’re curious about any of the materials I used.
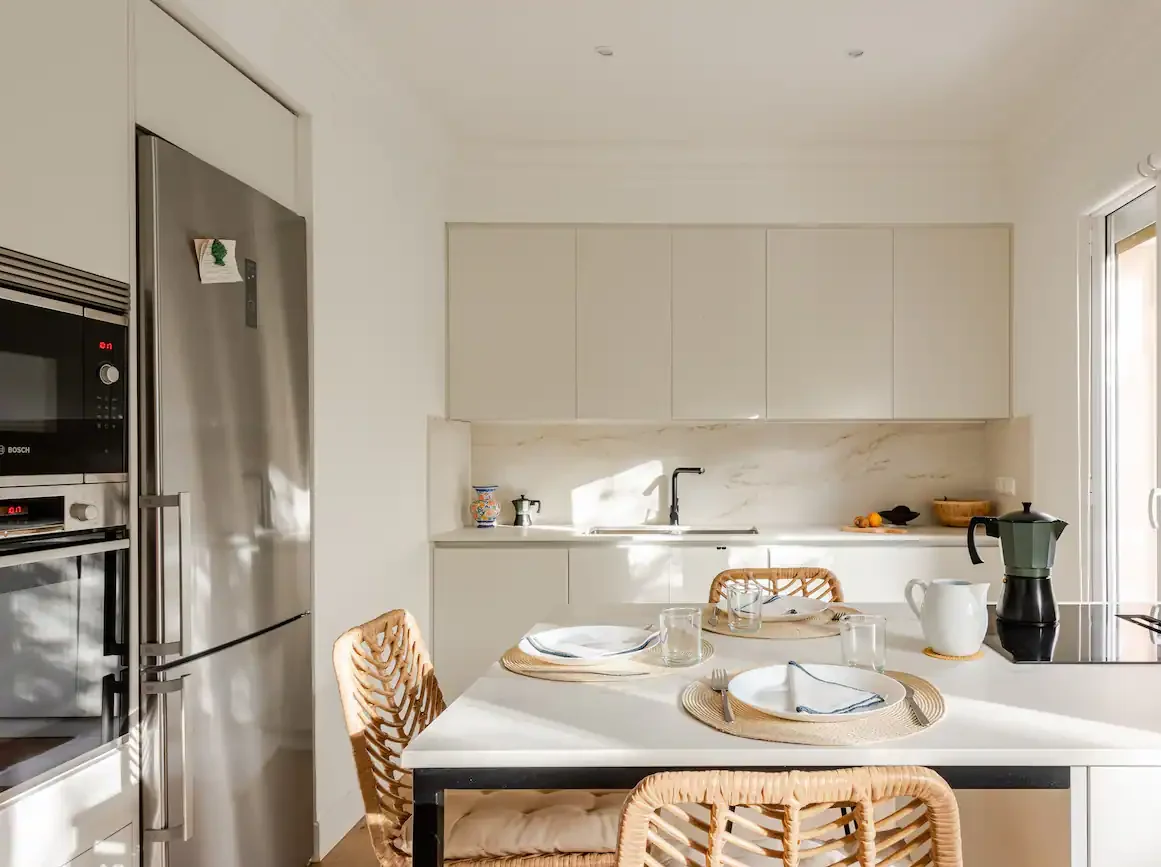
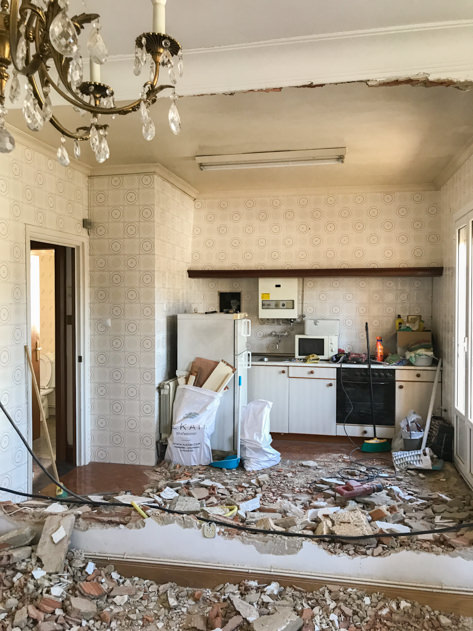
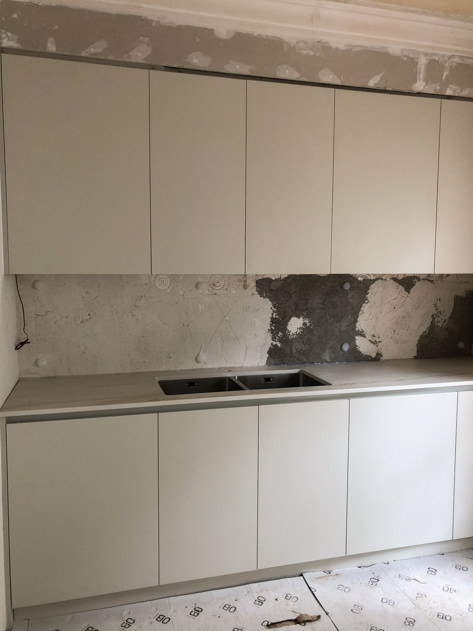
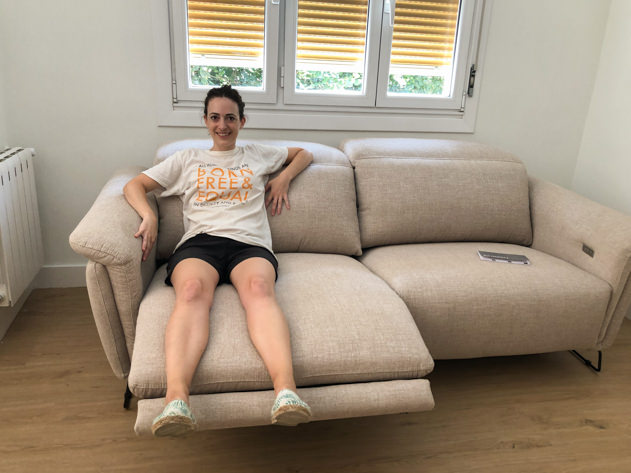
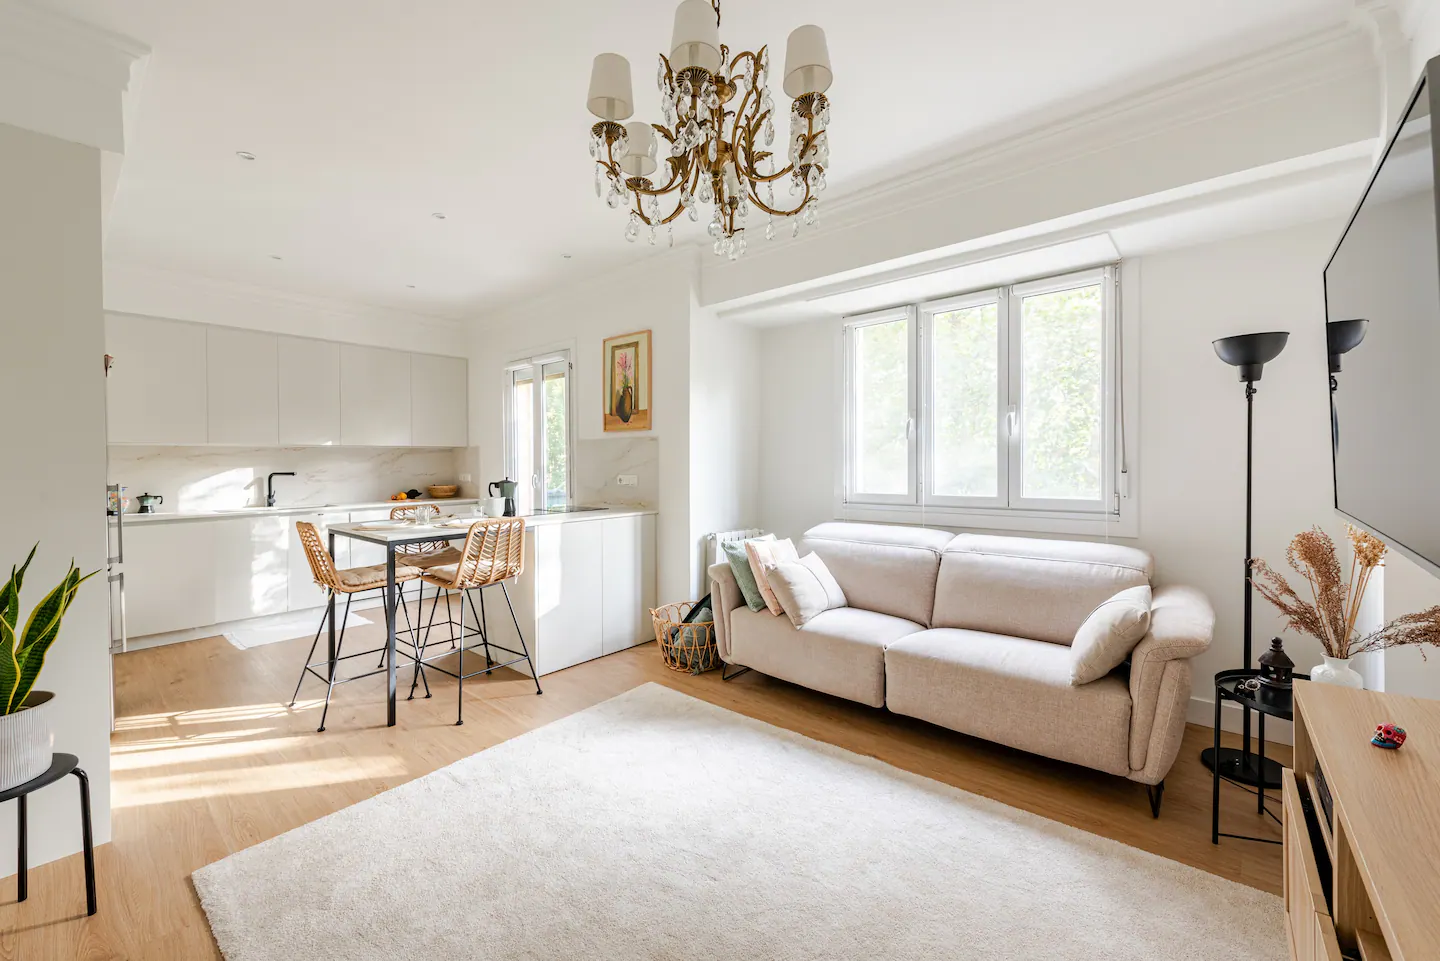
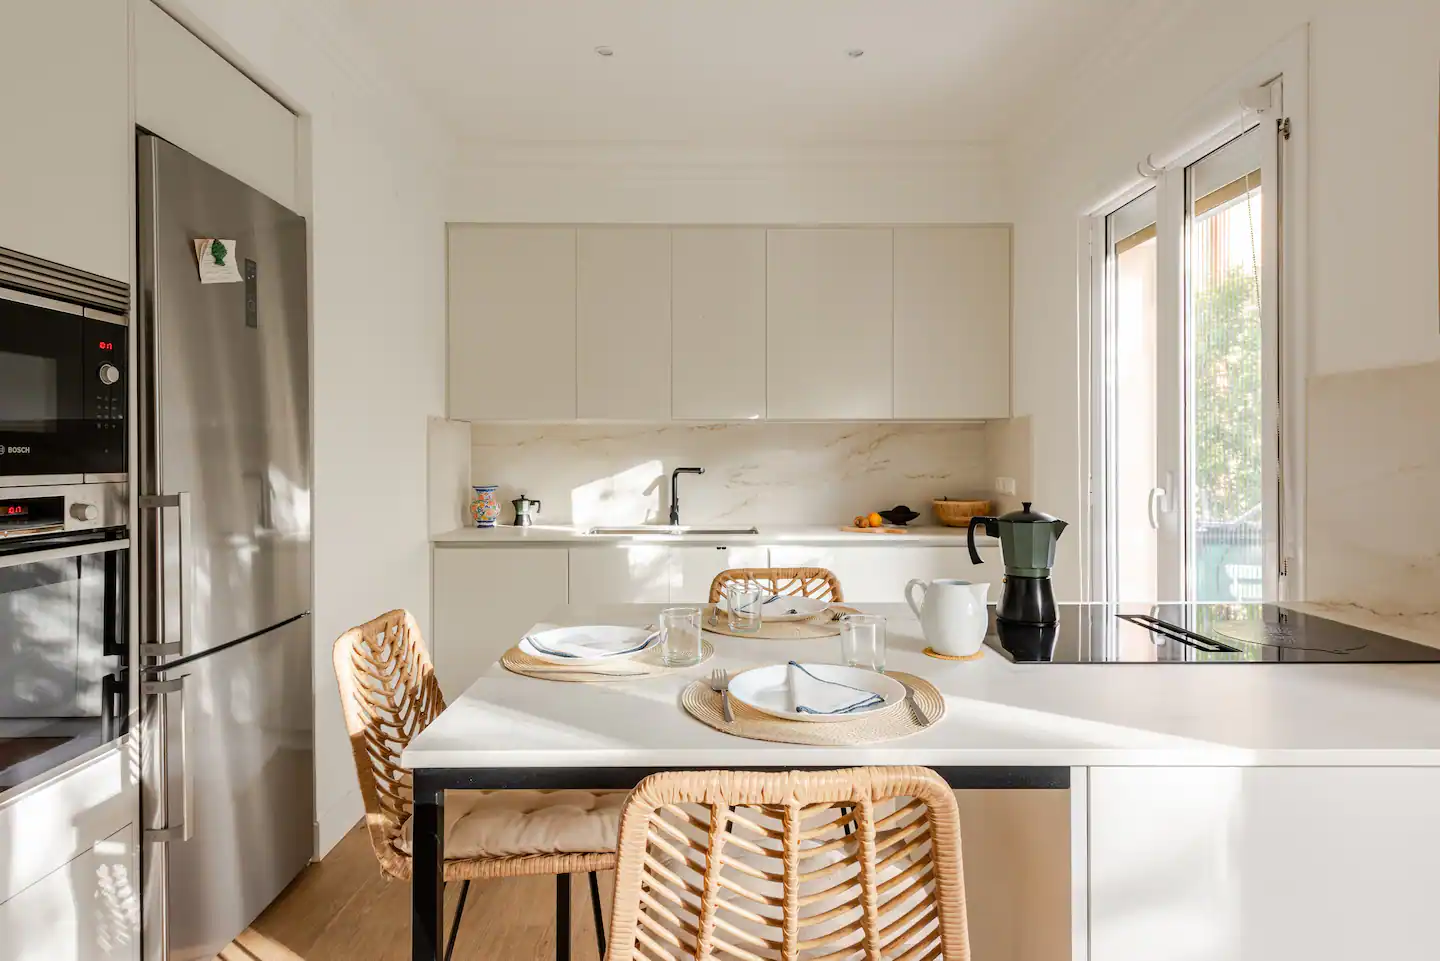
Open kitchen & living room space
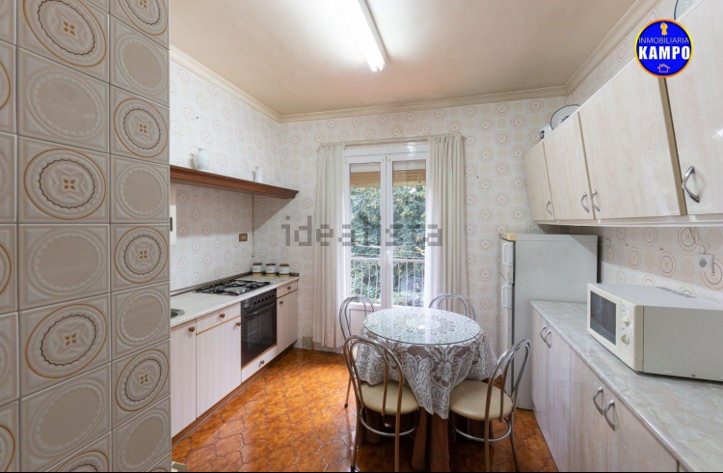

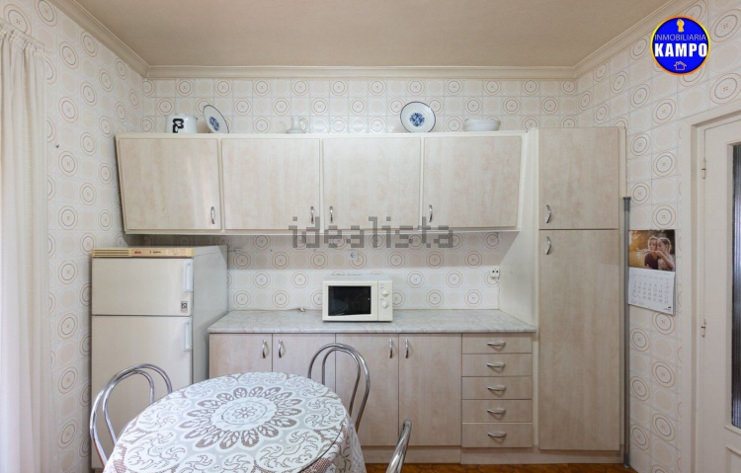
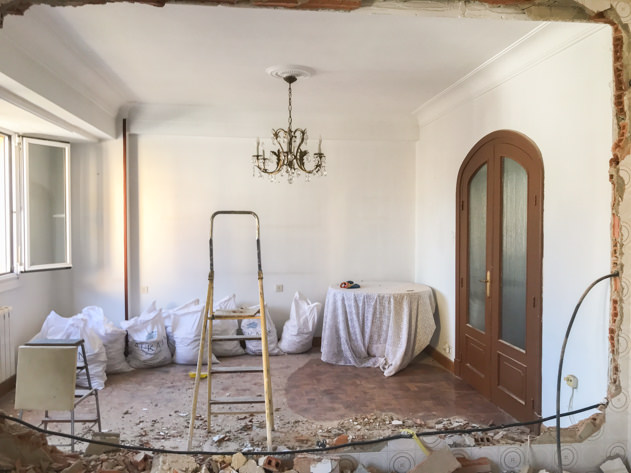
The major renovation of the project happened in this area of the house. I had a clear vision of connecting the kitchen with the living room, so I could watch TV while cooking or interact with guests while they would be at home. Originally, these rooms were separated by a wall and had an overloaded style. We started by removing the old cabinets and appliances before tearing down the partition wall. We had to deal with a lot of debris that we took to the nearest household waste recycling centre in Irún (known as garbigune). The boiler was moved out to the balcony and the radiators were also shifted. Furthermore, the door that gave access to the kitchen was replaced with plasterboard. Once the plumbing and building work were finished, it was time to assemble the new kitchen. I love how big the peninsula turned out to be as it can easily accommodate three people and is now perfect for my day-to-day lifestyle.
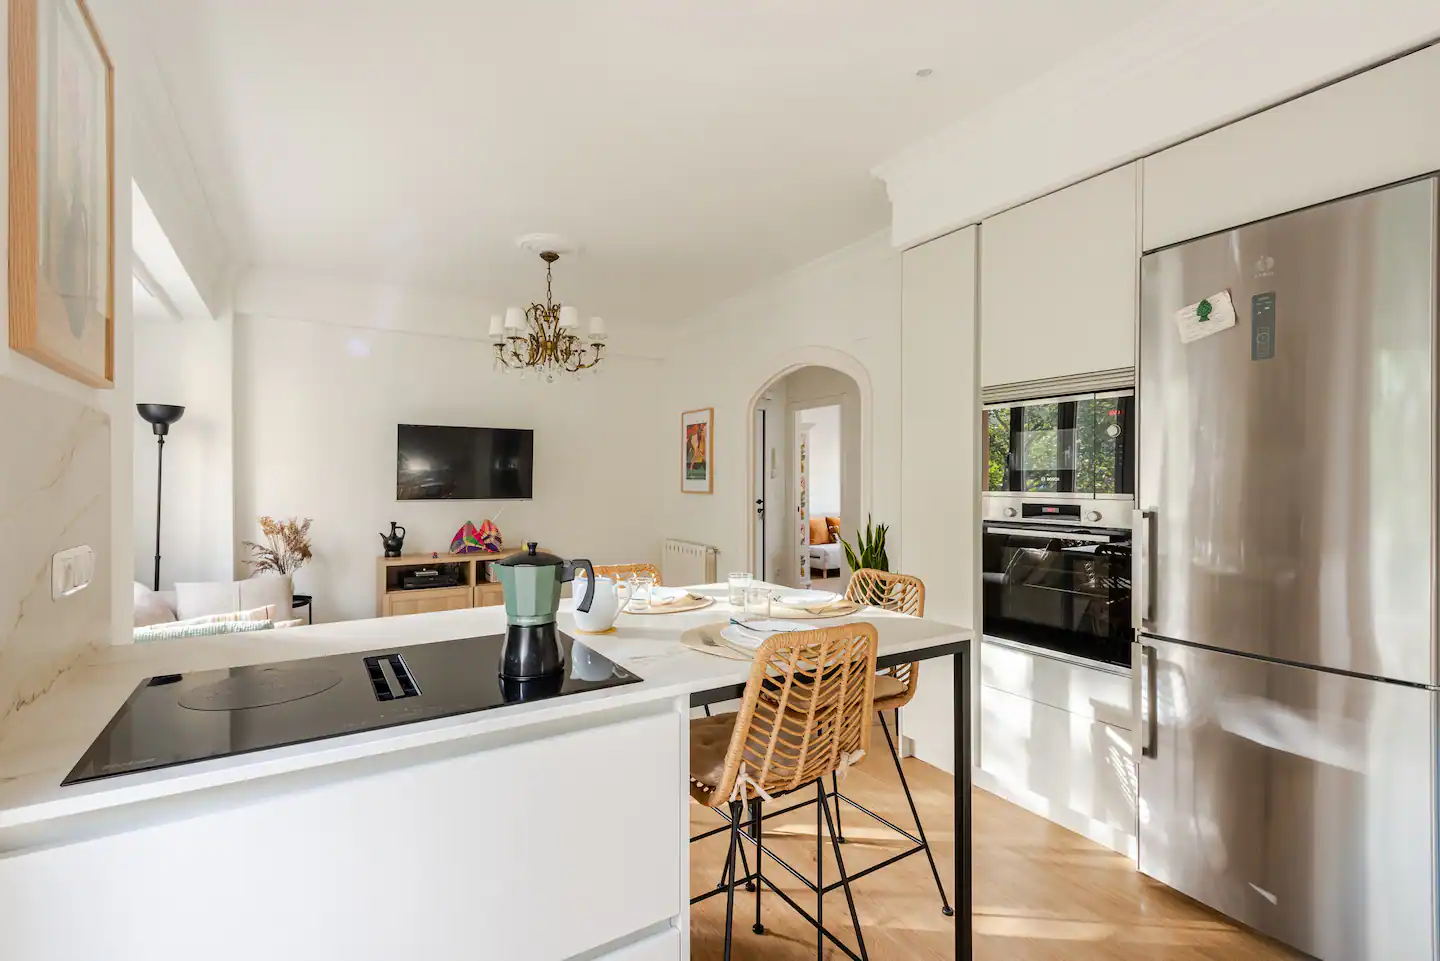
As for the living room, I wanted it to be a free flowing space. Hence, instead of having the TV in front of the couch and the kitchen counter, I decided to place the couch on one side, under the window. On the other hand, the TV was tied down to the large wall and can be moved sideways. I also removed the doors that gave access to the living room. Finally, I bought a dining table and chairs for big reunions that I keep in the storage room, since I won’t need these daily.
Finally, I used the same flooring throughout the whole house except for the main bathroom to bring coherence. Can you believe that the original layout had five different types of flooring and tiles?


Sources:
Kitchen cabinets, countertops and appliances: Muebles de cocina Seybe
Couch: Eurosofá (Ashley model)
Moldings: La Especialista (cornisa CR-7)
Construction materials and tools: Alkain
Flooring, doors and handles: Puertas Irati (floor: Galaxy Line Orion Wide Silence, natural model; doors: lacquered in white ; handles: Stockholm model in black)
Paint: Aiadek, Pinturas Muriel
Decoration: Ikea, Leroy Merlin, Sklum, Zara Home, H&M Home
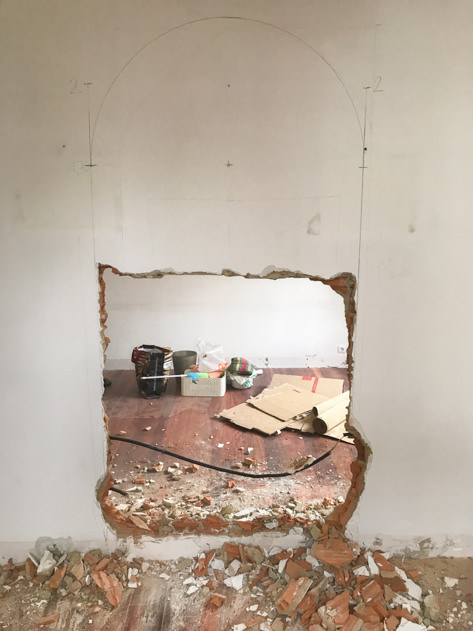
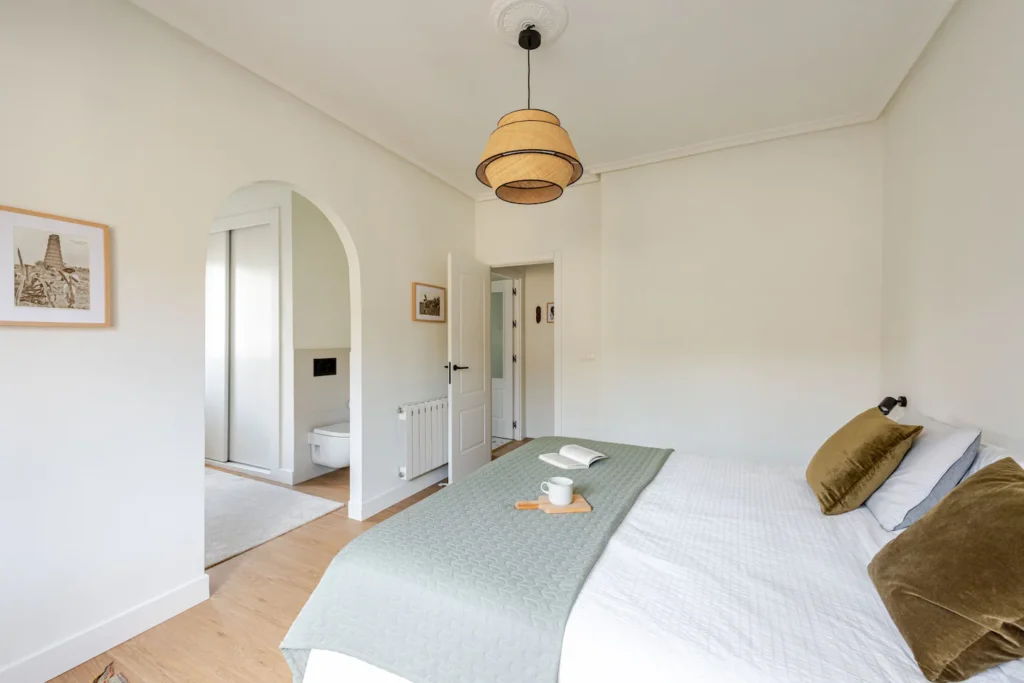
Main bedroom with walk-in closet and bathroom
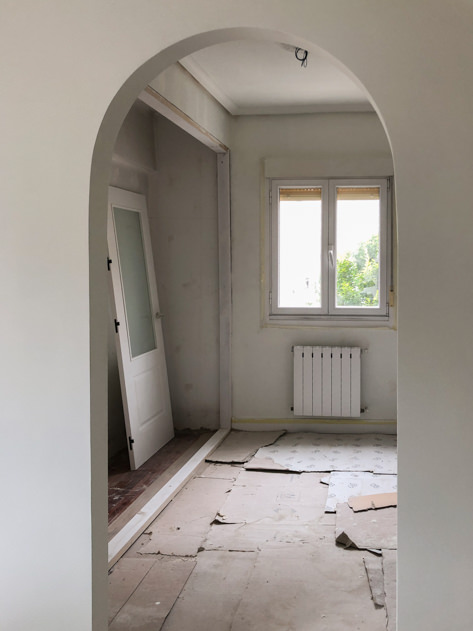
The original main bedroom was spacious and bright, although you couldn’t see all its potential because of the bulky dark furniture and decoration. Next to it across the wall was another bedroom with twin beds and a bookcase. I quickly envisioned a cozy bedroom with a reading corner connected to a walk-in closet and a bathroom through a Mediterranean arch (if you’re also a fan of Carrie Bradshaw in Sex and the City, you know what I’m talking about 🙂 ). Although I’m still waiting to find the perfect armchair, my bedroom is now my dream come true and I love ending the day here!
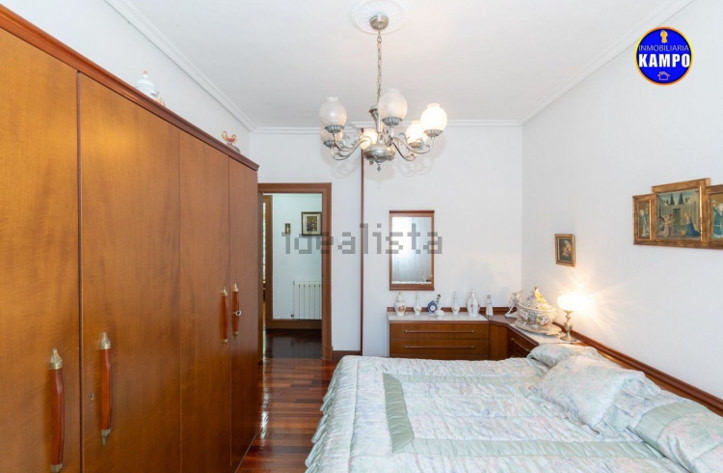
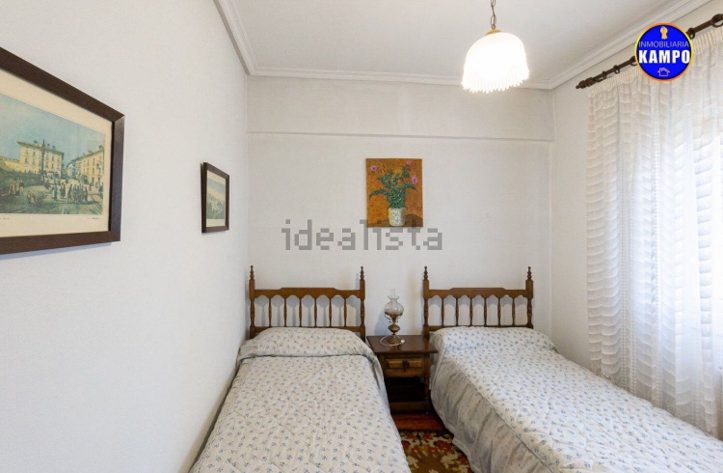

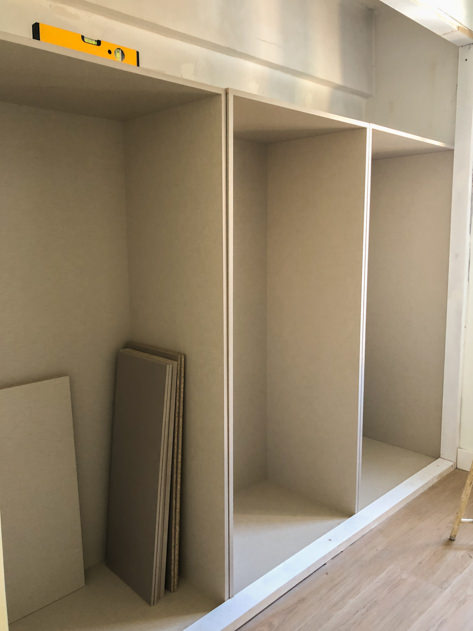
The bedroom was easy to deal with given the structure was already there, but the closet + bathroom was a bit more of a struggle since I had to rethink the whole layout. First, we closed the access to the twin-bed bedroom with plasterboard. Then, I decided to go for built-in closets on each side of the walls, which I built with my Dad from scratch. They were truly custom-made and I put a lot of thought into them because my objective was to see all my clothes at a glance. Before then, I would typically just have on hand the clothes of the current season and store the rest away.
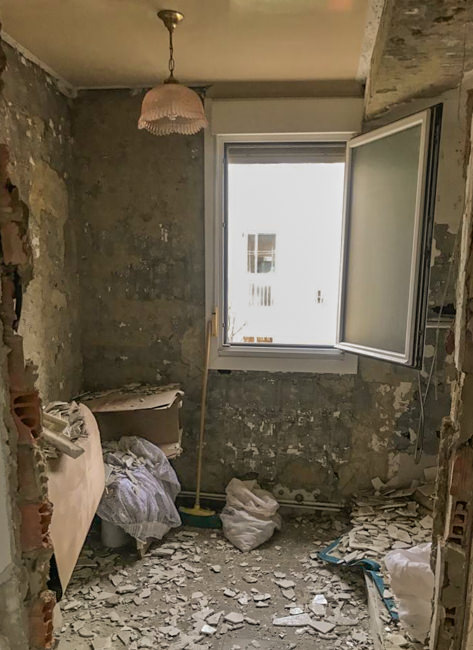
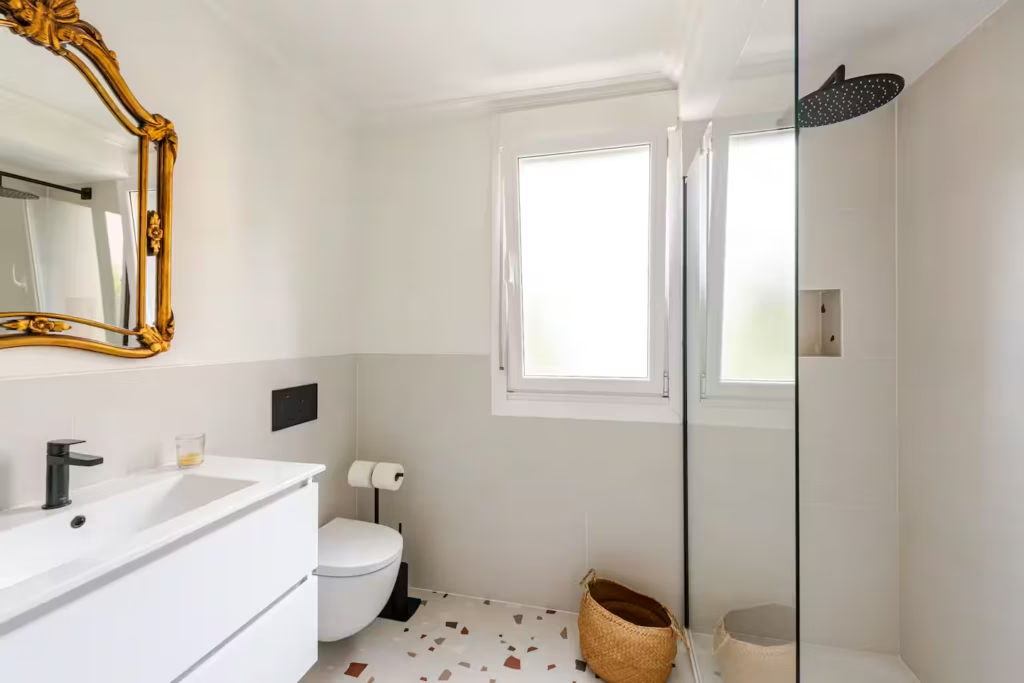
In other news, it took me quite some time to figure out the layout of the small bathroom given its tiny space (barely 2 square meters), but I made it work in the end even though it has no shower nor a door. Perks of living on your own! And can I just say that I love the tropical wallpaper? 🙂

Sources:
Wooden panels for the closets: Maderas Portu (lino Cancún model)
Plumbing, toilet, sinks, faucets: Sanitarios Sánchez
Wallpaper: Alkain
Mattress and storage bed: Eurosofá
Leroy Merlin: chest of drawers inside the closets, bedroom lamp, closet lamp, ethnic rug
Ikea: closet rug, nightstands, chest of drawers
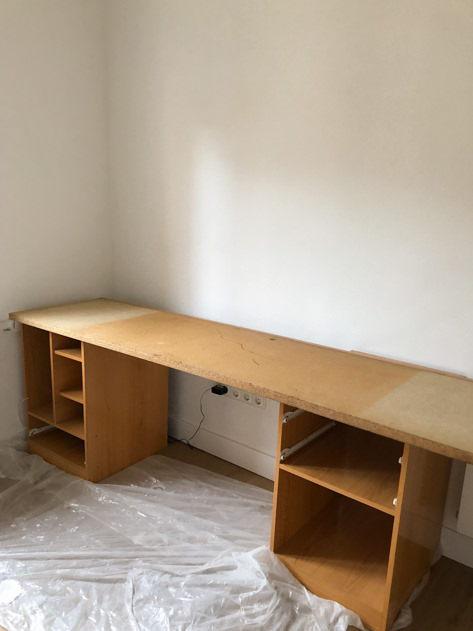
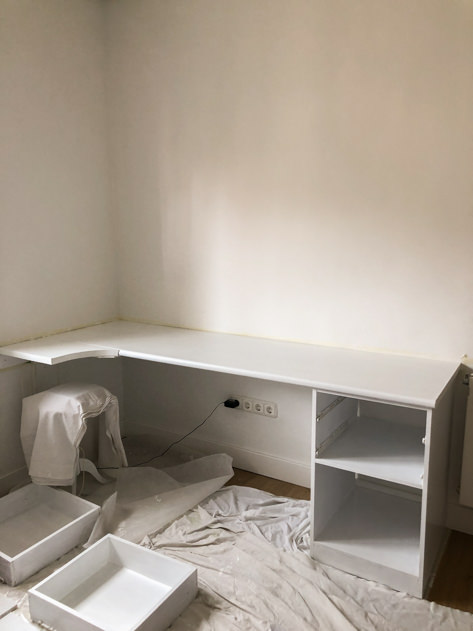
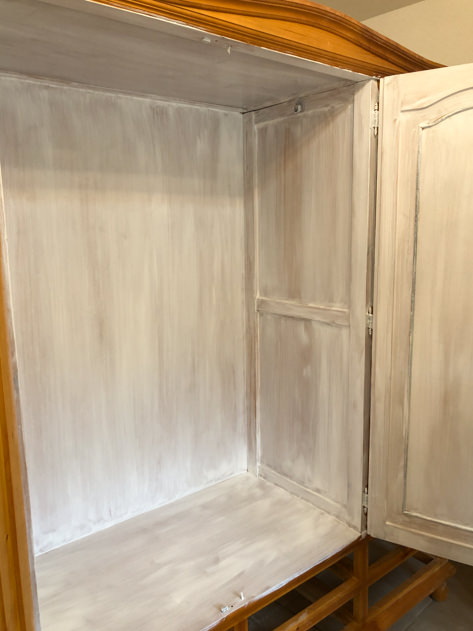
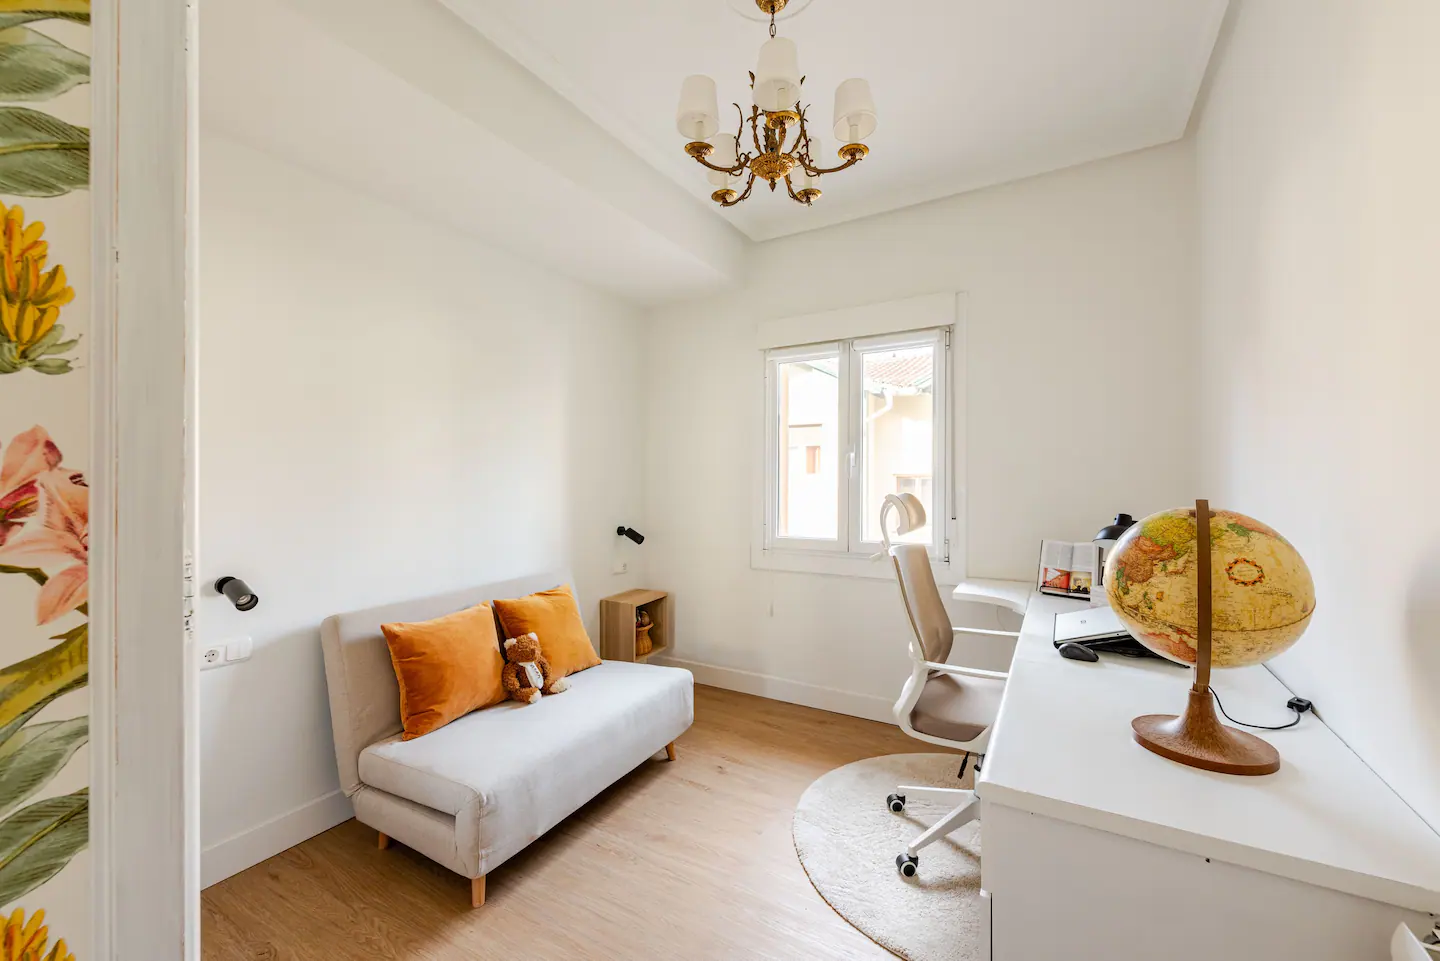
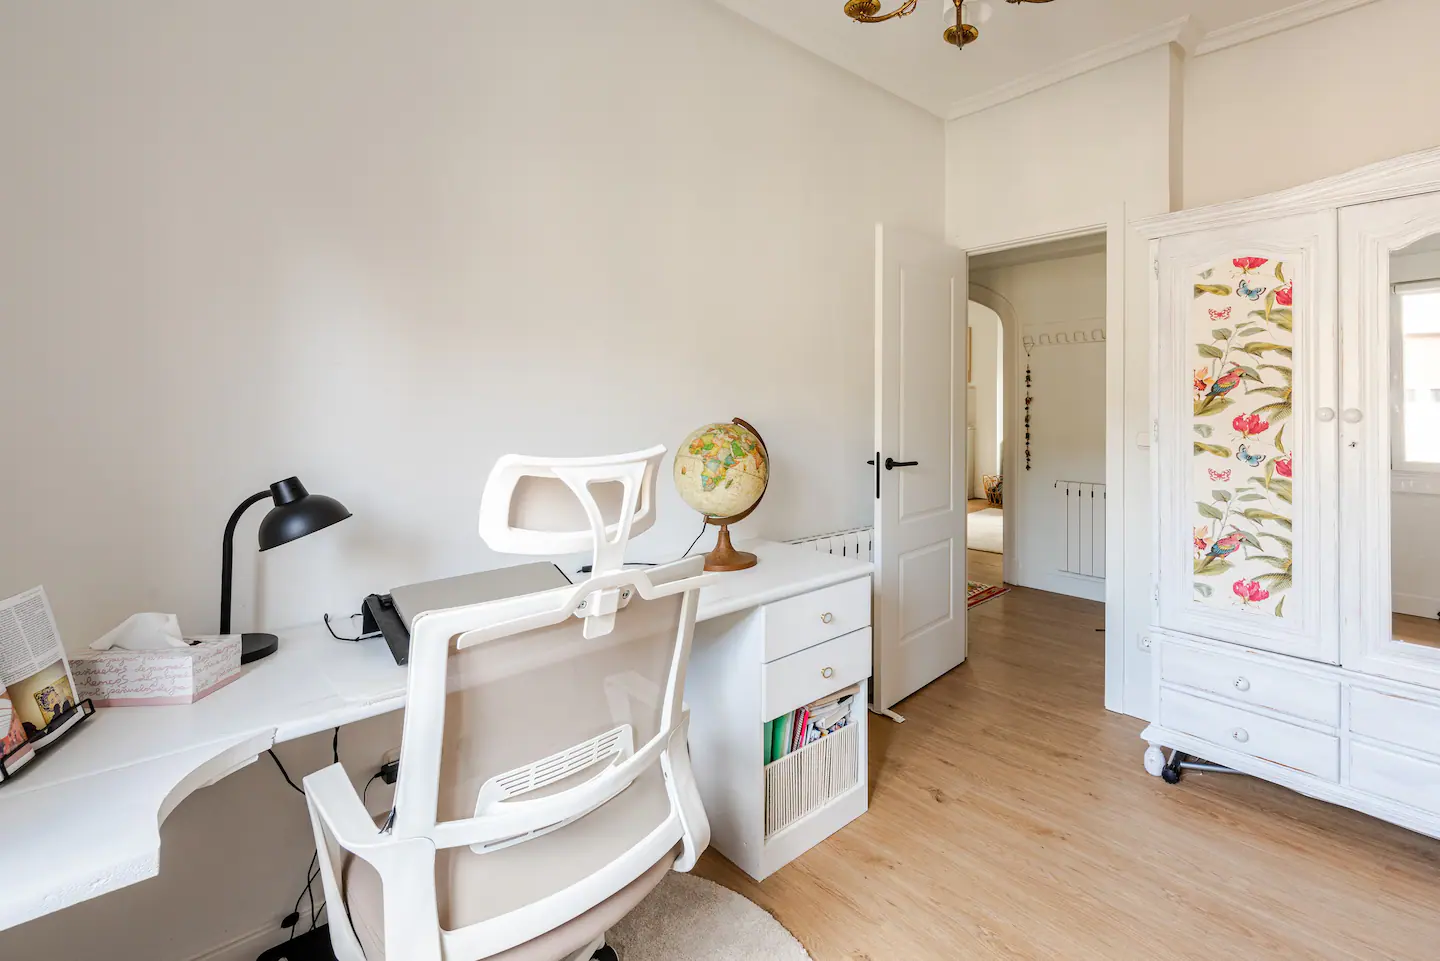
Office and guest room
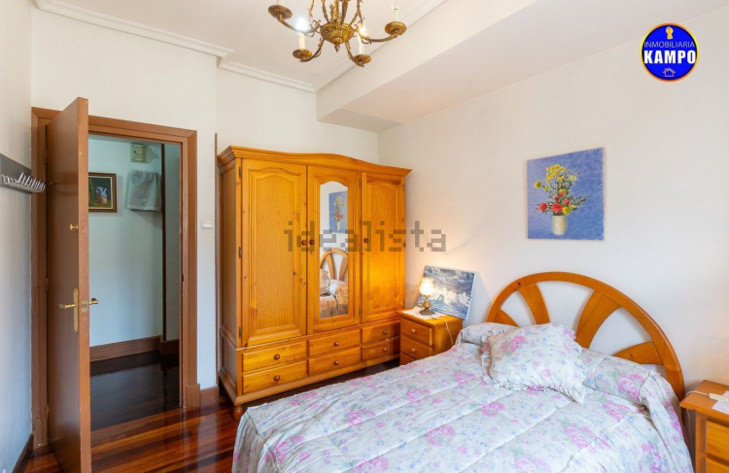
This was the third bedroom in the original layout of the house. Since I work from home and have guests quite often, I thought of transforming this bedroom into my remote office and guest room. It was an easy one because it had the perfect space to do so. I kept the chandelier and closet (my Mum beautifully repurposed it with paint and wallpaper), while I gave a new life to a desk that my brother and I used when we lived in Hendaye. A sofa-bed and a floating nightstand complete this room.
Sources:
Alkain: wallpaper
Ikea: round rug
Sklum: office chair and sofa-bed
Main bathroom
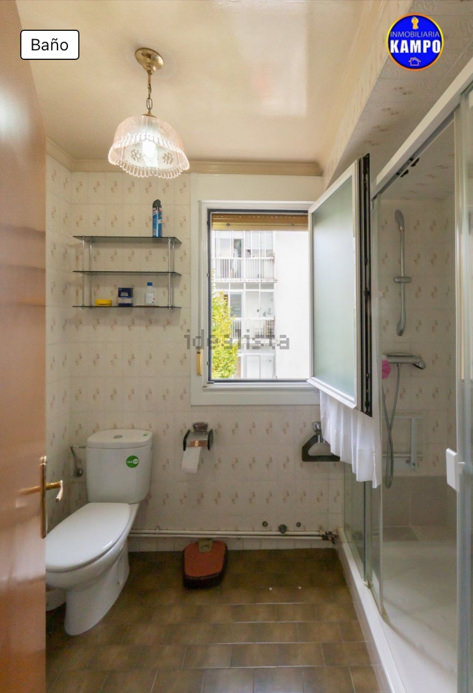
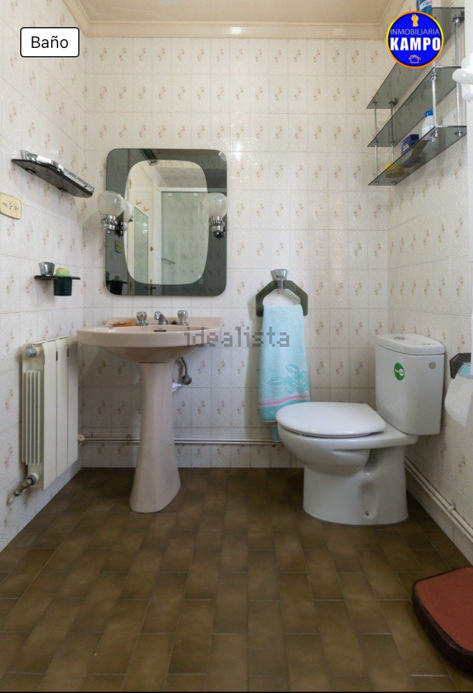
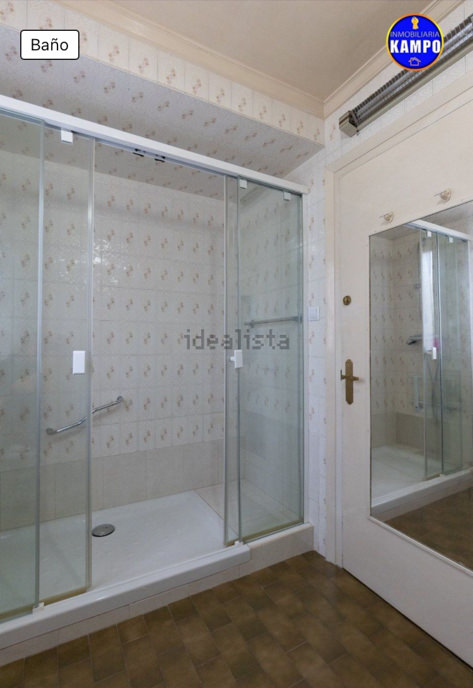
When I purchased the apartment, the bathroom had a decent size and the toilet and shower had been recently renovated. However, I disliked the tiles and the door was taking too much space. Since we had already put plasterboards in the doors that used to give access to the kitchen and the twin-bed bedroom, I decided we could go without those extra meters in the hallway, add them to the bathroom instead and place the new bathroom door there. Hence, the door would open and close in a ‘dead space’ without compromising the main bathroom area.
In the end, we completely demolished the bathroom and replaced it with a more modern one, including a floating toilet, a floor-level shower with a niche and black touches in the faucets.
Sources:
Tiles: Saltoki Home (Italgraniti, modelo Nuances Avorio Coccio and Bianco models)
Plumbing, shower, toilet, sinks, faucets: Sanitarios Sánchez
Hallway
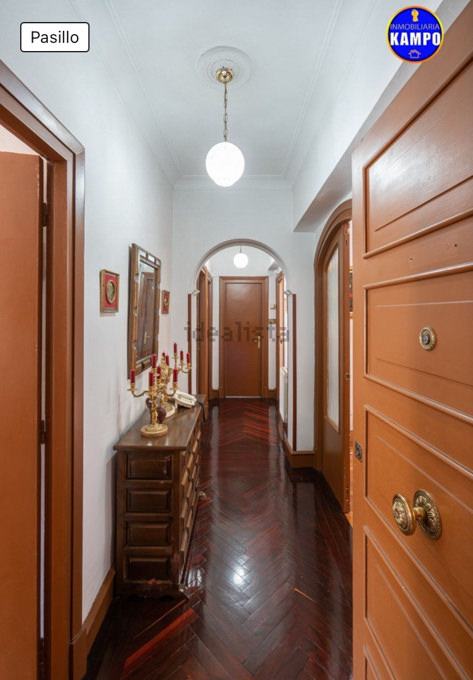
The original hallway was unnecessarily long and dark. In order to counter it, I first removed the arch in between the two sections of the hallway to unify the height in this space. Then, we lowered the ceiling and added built-in spotlights. In order to provide the hallway with more natural light while keeping its privacy, I took advantage of the window in the bathroom and added a door with obscure glass.
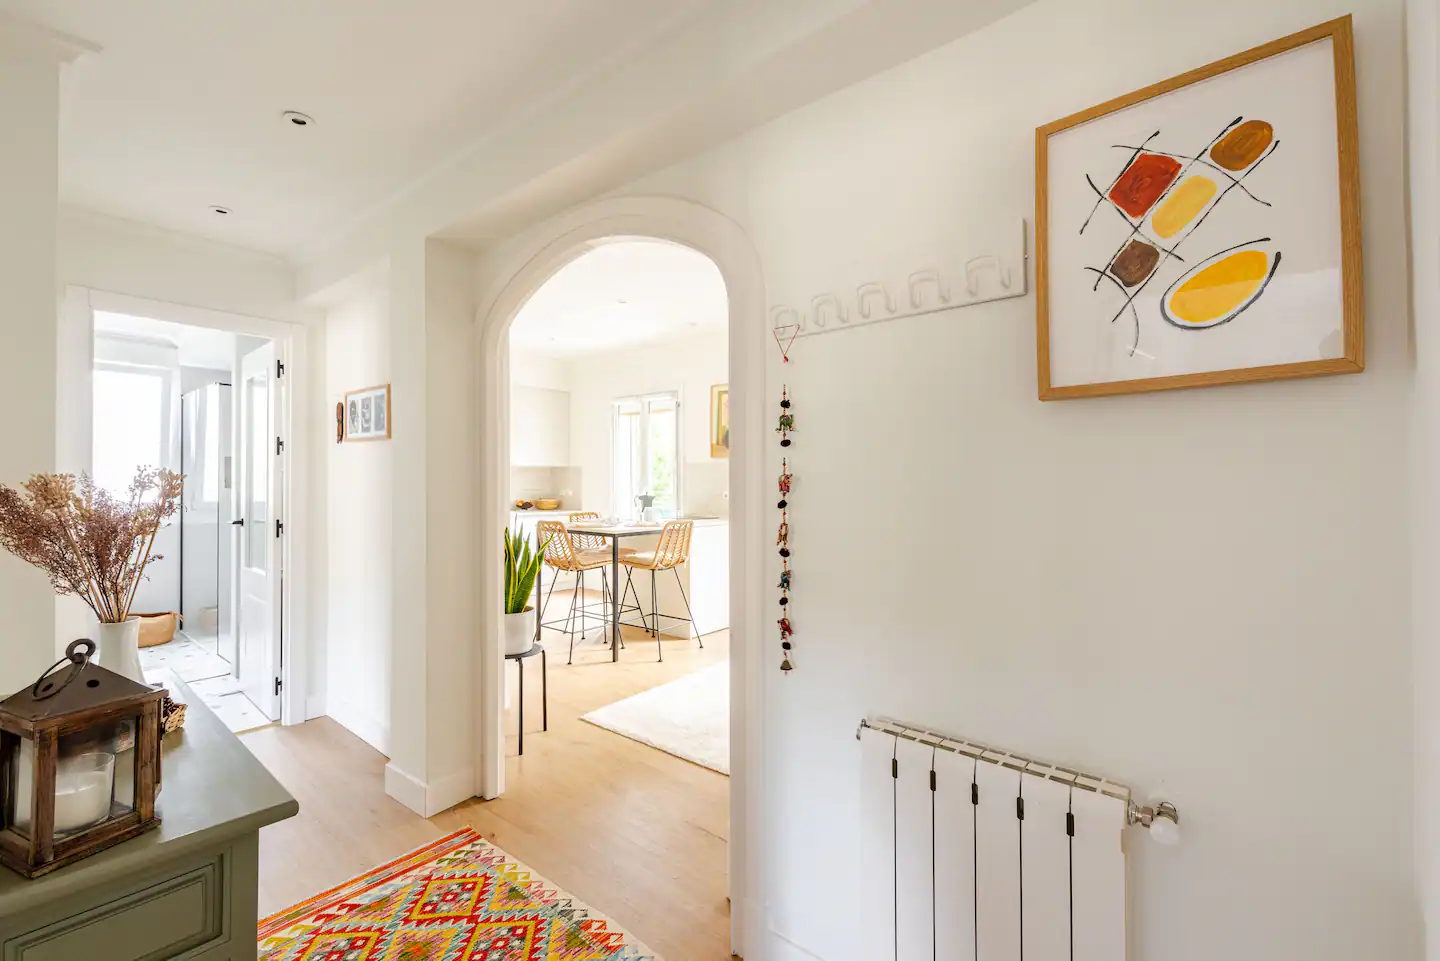
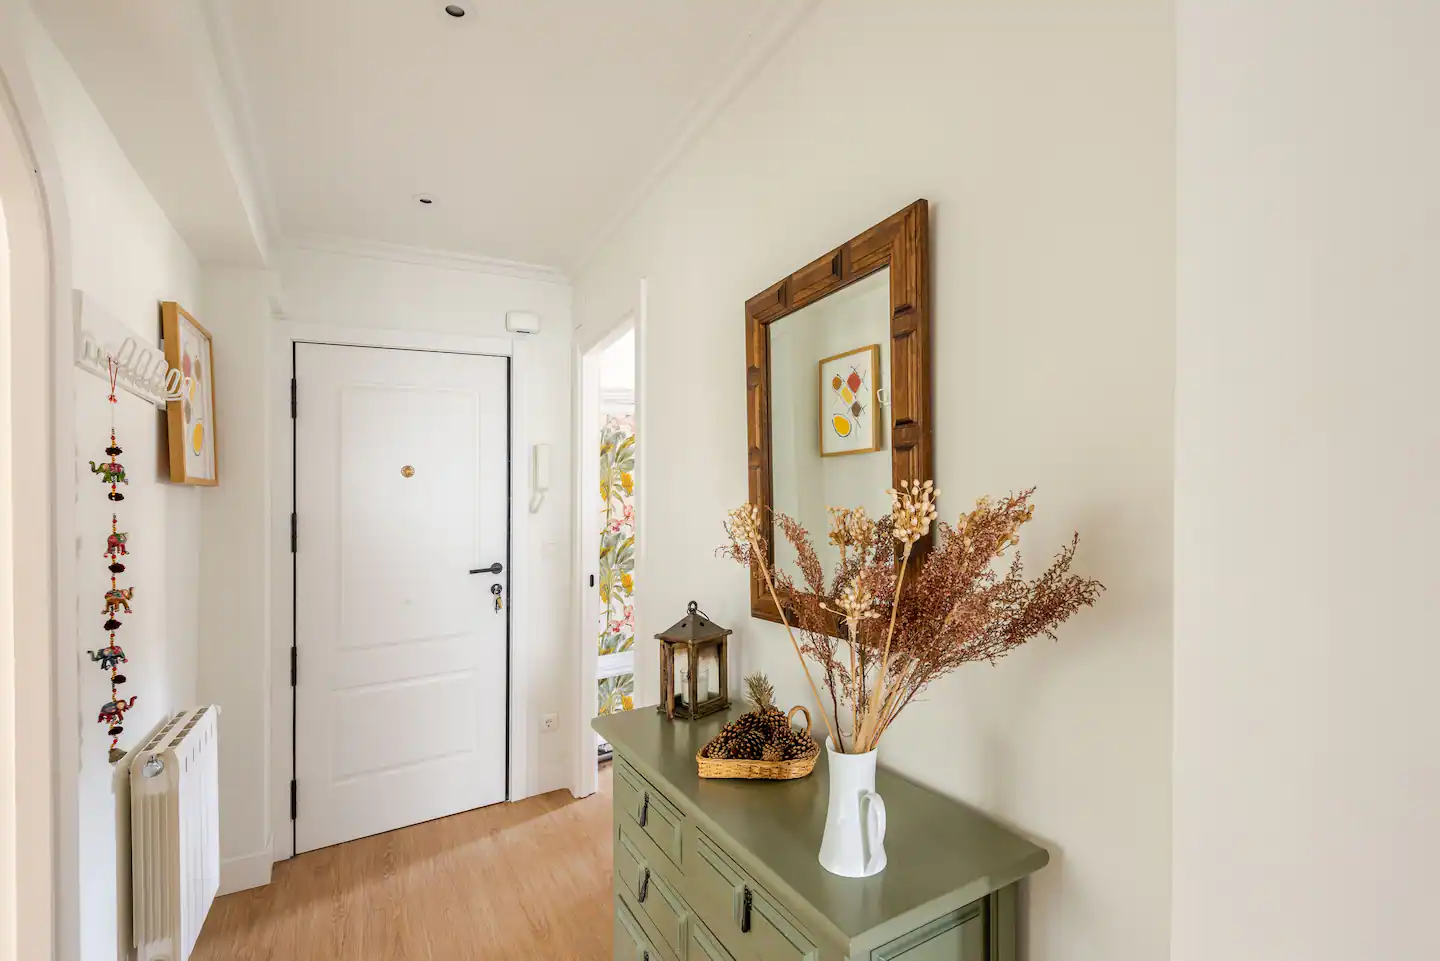
On the other hand, I reused all the original mirrors from the property and put one of them in the hallway. We also repurposed a dark wooden chest of drawers into an elegant piece of furniture using khaki paint.
Sources:
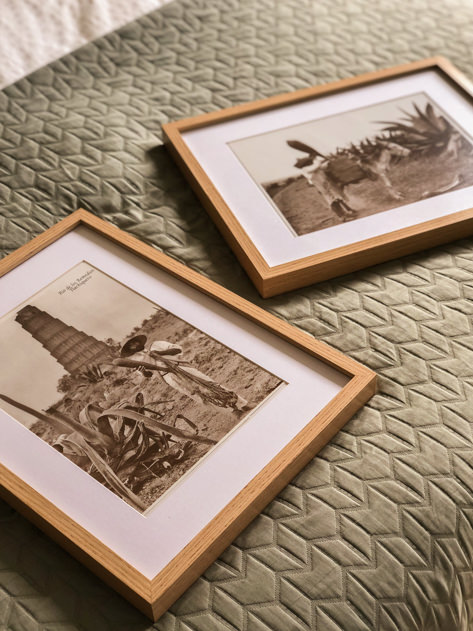
Leroy Merlin: ethnic rug, frames
The decoration process: the final stage after buying and renovating
Given the influence of my parents in the various houses we’ve lived in, I’ve always appreciated old pieces of furniture together with handmade creations and newer items. Old and new always went hand in hand. That is why my new home has its own eclectic character: it reflects the past from the 60s while having a modern look.
Picking the materials for the entire house took me months and a lot of back and forward visiting endless stores. I even had headaches given the many options I could choose from! From the floor to the tiles and from the kitchen cabinets to the paint on the walls, it seemed like a never-ending task. The delivery times were an important factor to consider too. Luckily, my parents were there to support me along the way and eventually I made it. I couldn’t be happier with the result now and my home looks exactly how I envisioned it. And what is more, I’m using it precisely the way I thought because I knew my needs from the very beginning.
When it comes to decorating, my advice would be to start from the bulkier items such as the bed or the couch and then take it from there with the smaller items (plants, rugs, vases and so on). More importantly, don’t be in a hurry to decorate right away. Take your time to live in your new space in order to see what it demands. It’s been almost been a year since I moved into my new apartment and I’m still adding decoration touches here and there, so trust me. 🙂
Last but not least, in this blog post I detailed how to list your place as a touristic apartment in Guipúzcoa step by step. If you’re looking for a cozy place to stay in Guipúzcoa, you’re welcome to rent my apartment. Feel free to browse the Airbnb announcement, including pictures and a detailed description of every room. In the post, I also shared a map where I listed my local tips to visit Irún and the nearby area. Enjoy!
Here’s what I’ve learned after buying and renovating my apartment in Irún (Spain). Was it helpful? Have you also bought or renovated a property in Spain? Drop me a line if you’d like to share your own experience.